Starting a Session
1. When you log into the website, you will automatically land on your Dashboard. If you have navigated to another page, just click on the "Videoconference" tab along top of your browser window to get back to the Dashboard.

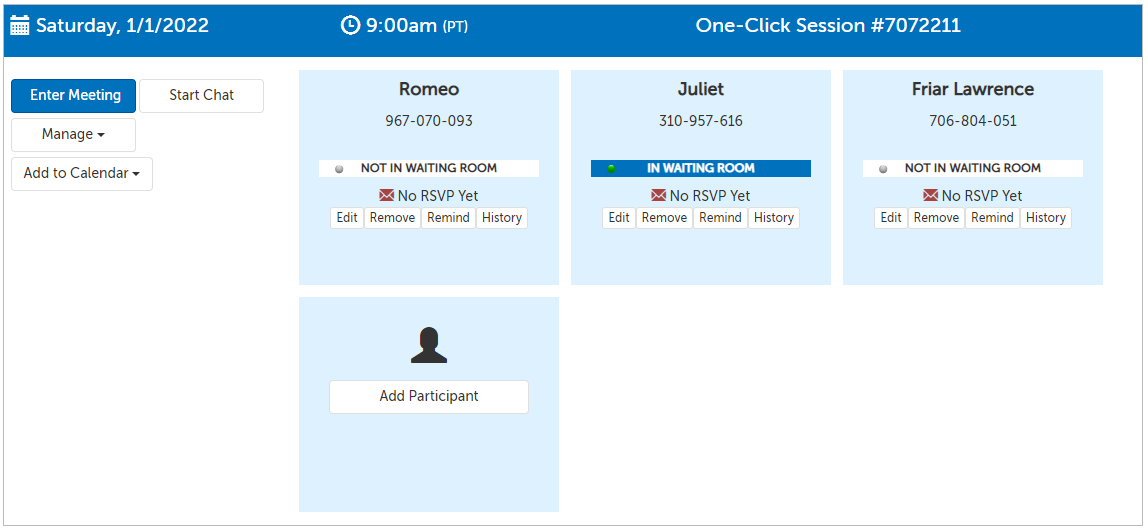
2. If one of your invitees has entered the waiting room, you will see a status notification underneath their name. In the below example,
- Not in Waiting Room (dot is gray, with "Not in Waiting Room" message):
Romeo and Friar Lawrence are not online.
- In Waiting Room (dot is green, with "In Waiting Room" message):
Juliet has entered the waiting room and is ready to be connected to.
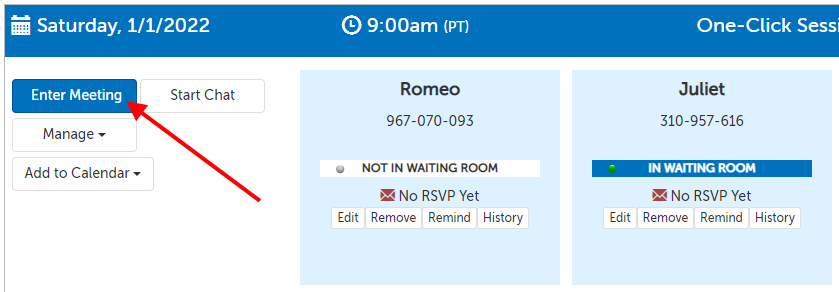
3. Click on the "Enter Meeting" button when you are ready to launch the meeting. Once a meeting has been started, any other invitees will be automatically added to the meeting when they arrive, without further action by you.
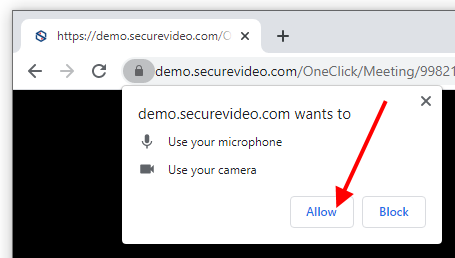
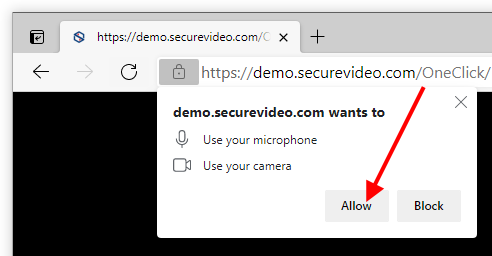
4. If this will be the first time you are connecting (or you have not previously saved permission), you will be prompted to give permission for One-Click to access your camera and microphone.
Examples of permission prompts for
- Chrome
- Edge:
- Safari:

- Firefox:
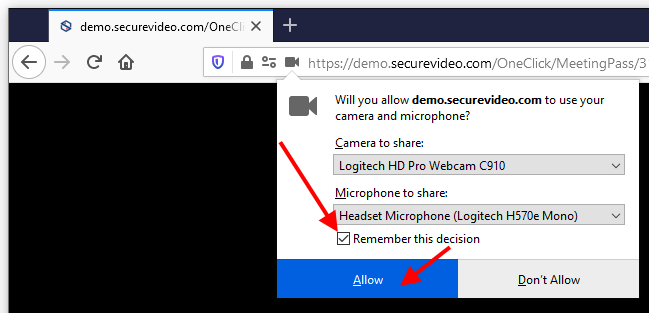
NOTE: If you accidentally denied permission, you will have to change your settings to grant permission before you will be able to enter the session. Please see the support article:
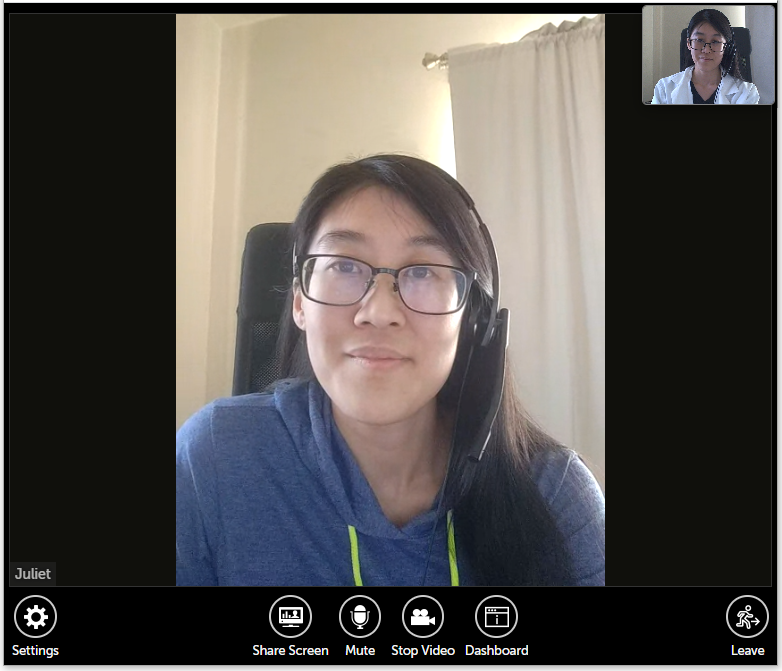
5. Once in the meeting, your video tile will appear in the upper right hand corner, and your participant(s) will take up the majority of the page. There will be several options at the bottom:
- Settings: change the selected microphone or camera.
- Share Screen: share a window or your desktop with other session participants.
- Stop/Start Video: turn your camera off or on (by default, the camera is on).
- Dashboard: minimize the video windows along the top to show your dashboard or the waiting room page.
- Leave: leave the session, or end the meeting for everyone.
When One-Click Waiting Room is Enabled
By default, if your participants join a session before you arrive, they would be able to see and interact with another. Additionally, if you invited a participant and they arrive late, they would be able to use their invite to enter the session when they are able to attend. However, if you would like to make sure that no participant can enter the session without being specifically allowed by you, you can enable the One-Click Waiting Room. (For instance, if you wanted to be able to speak privately with one participant before letting another in, or if you want to be sure that your participants cannot see one another before you arrive.)
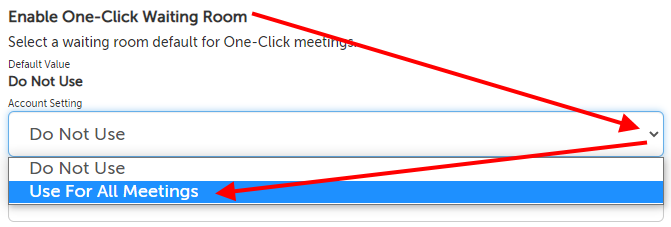
Enable One-Click Waiting Room Feature
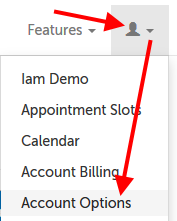
1. While logged in as an Account Administrator, click on the profile tab (head/shoulders icon) and select "Account Options" from the drop-down menu.
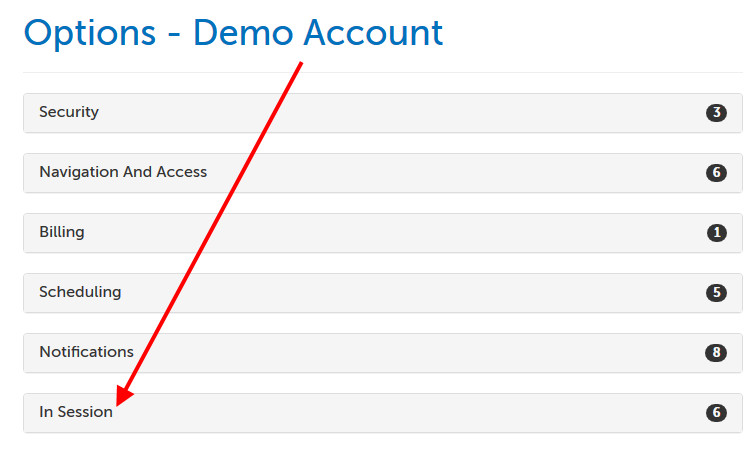
2. Click on the "In Session" section to expand it.
3. Scroll down to the "Enable Zoom Waiting Room" option and change the setting from "No" to "Yes". The change will be saved automatically.
Starting a Session When One-Click Waiting Room is Enabled
1. When you log into the website, you will automatically land on your Dashboard. If you have navigated to another page, just click on the "Videoconference" tab along top of your browser window to get back to the Dashboard.

2. If one of your invitees has entered the waiting room, you will see a status notification underneath their name. In the below example,
- Not in Waiting Room (dot is gray, with "Not in Waiting Room" message):
Romeo and Friar Lawrence are not online.
- In Waiting Room (dot is green, with "In Waiting Room" message):
Juliet has entered the waiting room and is ready to be connected to.

3. Click on the "Enter Meeting" button when you are ready to launch the meeting. If this will be the first time you are connecting (or you have not previously saved permission), you will be prompted to give permission for One-Click to access your camera and microphone.

4. Once you enter the session, you will be able to see if any participants are waiting to be allowed in, underneath the Participants icon in the upper left hand corner.
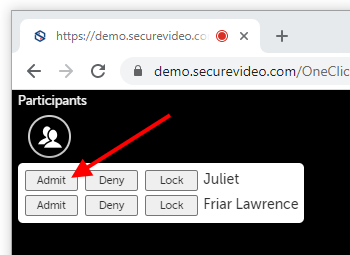
- Admit: this will allow the participant to connect to you and anyone else currently in the meeting. This allowance will be saved for this meeting; if they leave, they can re-enter the same meeting without requiring you to click "Admit" again.
- Deny: this will kick the participant back to the waiting room page, but they will be allowed to click "Enter Waiting Room" to try to enter again, and you will be presented with the same options for them.
- Lock: this pop up a confirmation message asking if you want to lock the participant out. If you confirm that you do, this will kick the participant out of the session, and deactivate their access code so that they will not be able to enter again. (You will have to go to your dashboard to add them as a participant to the session again if you would like them to be able to enter.)
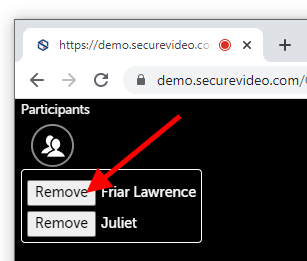
5. Once all participants have been admitted, click the Participants icon to show Remove buttons, if you would like to remove a particular participant.
- If a removed participant tries to re-enter, you will see the Admit, Deny, and Lock buttons appear for them underneath the Participants icon.
This article was last reviewed by our Support team on July 26, 2021.